Building a MIDI Synth With a Raspberry Pi
Background
I’m a keyboard/piano player, but I’m learning the Harpejji G16 as well. When playing in my band, I’ve tried playing bass lines with my left hand on the keys, and leads on the harpejji with my right hand. Unfortunately, the stage piano I’ve been using is too big to sit nicely with the harpejji, and attempting V-like instrument arrangements simply gave me RSI. I needed something smaller that was really easy to use, with as little setup as switching on my current keyboard! Part of my year of projects.
What you need for this Guide
- A Raspberry Pi, connected to the Internet. (I’m using an original Model B)
- A USB MIDI controller (I’m using an old Behringer U-CONTROL UMX-25)
- An SD Card with Raspbian installed. The NOOBS method is probably easiest.
- Speakers to plug into your Pi, for troubleshooting.
- Option A: Monitor & keyboard, for interacting with the Pi directly.
- Option B: another PC for SSHing to your PI.
Preparing your Pi
There’s a little bit of work required to get acceptable results out of your Pi. We’ll overlock this Pi, so you will need to power your Pi from a mains power supply to make sure it gets the juice it needs. From here on, we’ll assume you’ve logged into your Pi as the pi user and have a terminal to enter commands.
Overclocking
Run sudo raspi-config, and select Overclock from the menu.
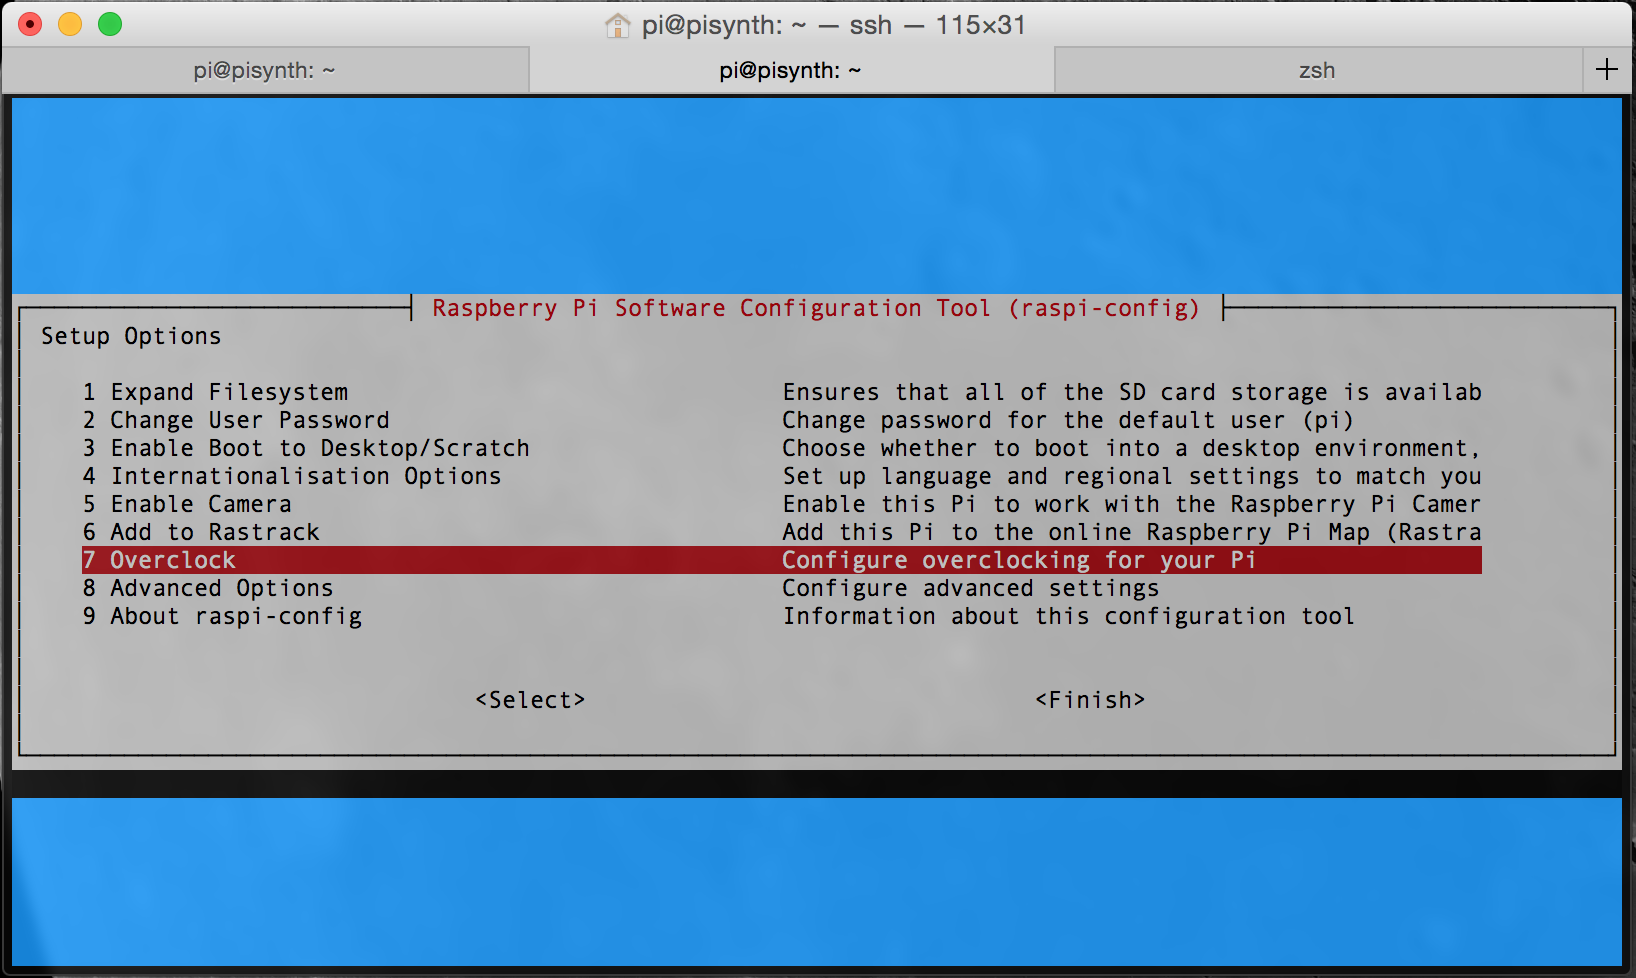
As I won’t be using this Pi for anything else, I’ve chosen to run it at the highest overlock, Turbo. If you’re not comfortable with this, you may choose a slightly less aggressive setting. Play around and find what works best for you.
Create a Separate User
Depending on what you’re trying to do, this step might not be necessary. But if, like me, you want to switch the Pi on and have things “just work”, you’ll want to do this.
Run the following commands:
1
| |
This creates the audio group, and adds a new user called synth to the Pi. It also sets the synth user’s primary group to audio. This is more important if you want to run your audio through the JACK audio server. I’m choosing not to here, but it’s an option. If you do decide to investigate JACK further, Ted’s Linux MIDI Guide has some useful information.
Next, we want to allow the synth user to run commands with elevated privileges using sudo. Run sudo visudo, which will bring up the sudoers file.
Navigate to the bottom of the file, and add this line:
synth ALL=(ALL) NOPASSWD: ALL
Save and exit the text editor. If no errors come up, the synth user should now be able to run sudo without needing a password.
Setting up the MIDI
Plug your MIDI controller into one of the Pi’s USB ports, and make sure it’s turned on.
Run aconnect -o, and look for your MIDI controller in the output:
1 2 3 4 5 | |
Write down your controller’s client number - you’ll be needing it later.
To verify that MIDI events are being sent, run aseqdump -p *xx* (replacing xx with the client number you just wrote down). Play some keys, and verify that note on/off messages are coming through.
Making Some Noise
There are a few options you can choose to generate sound from your Pi, but I’m going with FluidSynth. CPU cycles are precious on a lower-powered device, so more complicated audio software may not work as well. YMMV.
Plug your speakers into the Pi’s stereo output, and make sure they’re switched on with the volume at a low-medium level.
At your Pi’s terminal (again, assuming you’re logged in as the pi user):
1 2 3 4 5 6 7 8 9 10 | |
If everything worked properly, you should have heard noise come out of your speakers!
Wiring it all together
This can get a little fiddly, and I found it helpful to have 2 terminals open on the Pi at once.
In terminal 1, run:
1 2 3 4 5 6 7 8 9 10 11 | |
In terminal 2, run:
1 2 3 4 5 6 7 8 | |
Write down the client number for Fluidsynth as well.
Now let’s hook up both ends! In terminal 2, run:
1 2 | |
Play some notes on your keyboard - you should hear some piano sounds come out of your speakers!
Automating everything
Doing all the setup is fine and good, but I’m not going to lug a keyboard around and run everything each time I power on the Pi! Let’s get it happening automatically.
WARNING: Getting these next steps wrong could stop your Pi booting properly. Be careful!
Switching to upstart
Run sudo apt-get install upstart, following the warnings carefully, then reboot your Pi.
Autologin
Now we’ll set the Pi to autologin the synth user we made earlier. Backup /etc/init/tty1.conf, then edit it with sudo privileges so it looks like this:
1 2 3 4 5 6 7 8 9 10 11 12 13 14 | |
This will automatically login the synth user on the first terminal. You can verify this by plugging a monitor into the Pi and rebooting it – instead of seeing a login prompt you should see a shell for synth.
.profile
Whenever you log into a Linux machine, a script called .profile gets run. Adding our fluidsynth setup from earlier (with a few tweaks) will run everything whenever the Pi is booted up.
Add the following to the end of /home/synth/.profile:
1 2 3 4 5 6 7 8 9 10 11 12 | |
Reboot your Pi, and when it’s finished booting, play some keys and listen to your new synth!
Troubleshooting
ALSA
If running aplay above didn’t make any noise, perhaps you need to tweak your Pi’s volume levels. Run alsamixer and check that your output is right:
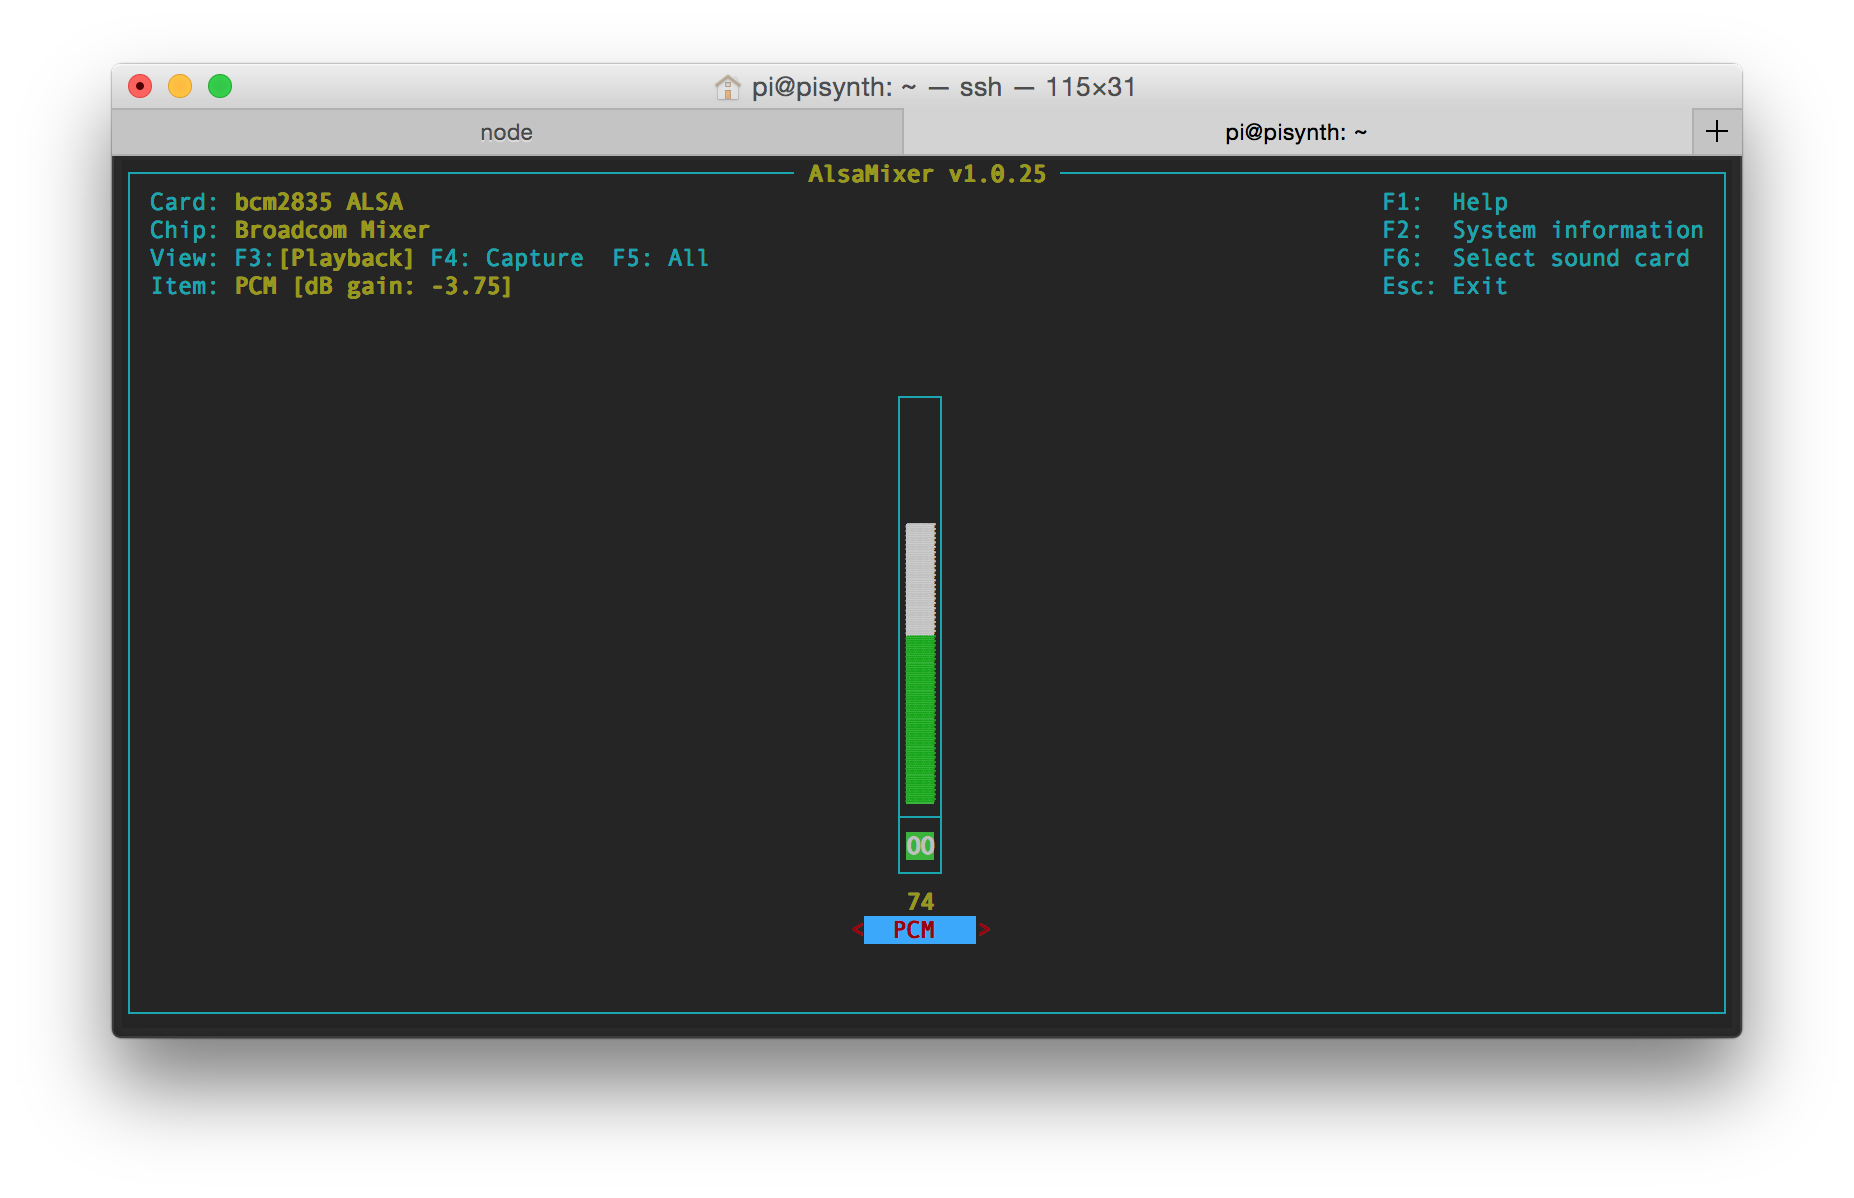
You should make sure that the output is set to be the Broadcom chip, not HDMI or your MIDI device if you’ve plugged it in. You can adjust the volume with the arrow keys &endash if this isn’t working, try pressing m to unmute.